lock TESLA MODEL X 2019 User Guide
[x] Cancel search | Manufacturer: TESLA, Model Year: 2019, Model line: MODEL X, Model: TESLA MODEL X 2019Pages: 224, PDF Size: 5.17 MB
Page 59 of 224

Starting and Powering
Off
Starting When you open a door, Model X powers on
the instrument panel and touchscreen and you
can operate all controls.
To drive Model X:
1. PRESS THE BRAKE PEDAL - Model X
powers on and is ready to drive.
2. SELECT A GEAR - Move the gear lever all
the way down for Drive and all the way up
for Reverse. See Shifting Gears on page
60.
Note: If the PIN to Drive feature is enabled
(see PIN to Drive on page 153), you must also
enter a valid PIN on the touchscreen before
you can drive Model X.
Note: If Passive Entry is off and you do not
press the brake pedal to start Model X within
approximately five minutes, a message
displays on the instrument panel and you must
use the key to lock then unlock Model X again
before starting the vehicle.
Everything you need to know when driving
Model X displays on the instrument panel.
Key Not Inside
If Model X does not detect a key when you
press the brake, the instrument panel displays
a message telling you that a key is not inside.
If you receive this message, place the key in
the center console cup holder where Model X
can best detect it.
If Model X still does not detect the key, try
holding it against the center console,
immediately below the 12V power socket (see
12V Power Socket on page 22). If the key is
still not detected, remove the key
Page 62 of 224

Lights
Controlling Lights Touch Controls > Lights on the touchscreen to
control the lights.
In addition to the lights that you can control
from the touchscreen, Model X has
convenience lights that turn on and off
automatically based on what you are doing. For example, you will notice interior lights,marker lights, tail lights, door handle lights,
and puddle lights that turn on when you unlock Model X, when you open a door, and
when you shift into Park. They turn off
automatically after a minute or two or when
you shift into a driving gear or lock Model X.
Note: The image below is provided for
demonstration purposes only. Depending on vehicle options, software version and market
region, your touchscreen may appear slightly
different.
1. Exterior lights (headlights, tail lights, side
marker lights, parking lights, and license
plate lights) are set to AUTO each time
you start Model X. When set to AUTO,
exterior lights automatically turn on when
driving in low lighting conditions. If you
change to a different setting, lights always
revert to AUTO on your next drive.
Touch one of these options to temporarily
change the exterior light setting:
Page 73 of 224

Brakes
Braking Systems
Warning: Properly functioning braking
systems are critical to ensure safety. If you experience a problem with the brake
pedal, brake caliper, or any component of
a Model X braking system, contact Tesla
immediately.
Model X has an anti-lock braking system
(ABS) that prevents the wheels from locking
when you apply maximum brake pressure. This
improves steering control during heavy
braking in most road conditions.
During emergency braking conditions, the
ABS constantly monitors the speed of each
wheel and varies the brake pressure according
to the grip available.
The alteration of brake pressure can be felt as
a pulsing sensation through the brake pedal.
This demonstrates that the ABS is operating
and is not a cause for concern. Keep firm and
steady pressure on the brake pedal while
experiencing the pulsing.
The ABS indicator brie
Page 96 of 224

8.Remove the key and store it in a safe
place (preferably inside the vehicle).
Note: The key can be removed only if the
hitch is locked. This indicates a proper
connection. Do not use the hitch if the key
is not removed.
Note: Tesla recommends making a note of
the key code. You need this code if you lose the keys and need to order areplacement.
9. Close the dust cover to prevent dirt and
debris from entering the lock. For newer
version with push clips, reattach the dust
cover, snap it in place and open the push
clips before pushing them in.
Note: To maintain the hitch, regularly grease
its surfaces with non-resinous grease.
Disconnecting the Tow Hitch After towing, remove the hitch:
1. Insert the key and turn to align the top of
the key with the “unlocked” position.
2. While firmly holding the bottom of the
hitch (to prevent it from dropping to the
ground), pull the locking cylinder out
approximately 0.5 cm, and turn it
clockwise until the red marking on the
locking cylinder aligns with the white dot.
At this point, the locking cylinder is locked
in the "open" and the hitch drops out of
the housing.
Warning: Be careful when turning the
locking cylinder. If it does not lock
into the “Open Position”, it
automatically retracts into its original
“closed" position and can pinch your fingers.
3. Reinstall the dust cover on the hitch
housing to prevent dirt from accumulating
inside the housing.
4. Close the dust cover on the hitch
Page 154 of 224

Security Settings
About the Security System
If Model X does not detect a key nearby and a
locked door or trunk is opened, an alarm sounds and the headlights and turn signals
Page 159 of 224

Software Updates
Loading New Software
Model X updates its software wirelessly,
providing new features throughout your term of ownership. Tesla recommends that you
install software updates as soon as they are
available. The first time you enter Model X
after an update is made available, a scheduling window displays on the touchscreen. The
scheduling window displays again at the end
of your first driving session.
Note: Some software updates can take up to
three hours to complete. Model X must be in
Park while the new software is being installed.
To ensure the fastest and most reliable
delivery of software updates, leave the Wi-Fi
turned on and connected whenever possible
(see Connecting to Wi-Fi on page 157).
Note: Software updates using cellular data are
also available if your vehicle is equipped with
premium connectivity.
Warning: Do not attempt to use the
vehicle while the software is being
updated. Vehicle functions, including
some safety systems, may be limited or disabled while a software update is inprogress and you could damage the
vehicle.
When a software update is available, a yellow
clock icon appears on the touchscreen
Page 165 of 224

Charging Instructions
Opening the Charge Port The charge port is located on the left side of
Model X, behind a door that is part of the rear
tail light assembly. Before charging, park
Model X to ensure that the charge cable easily reaches the charge port.
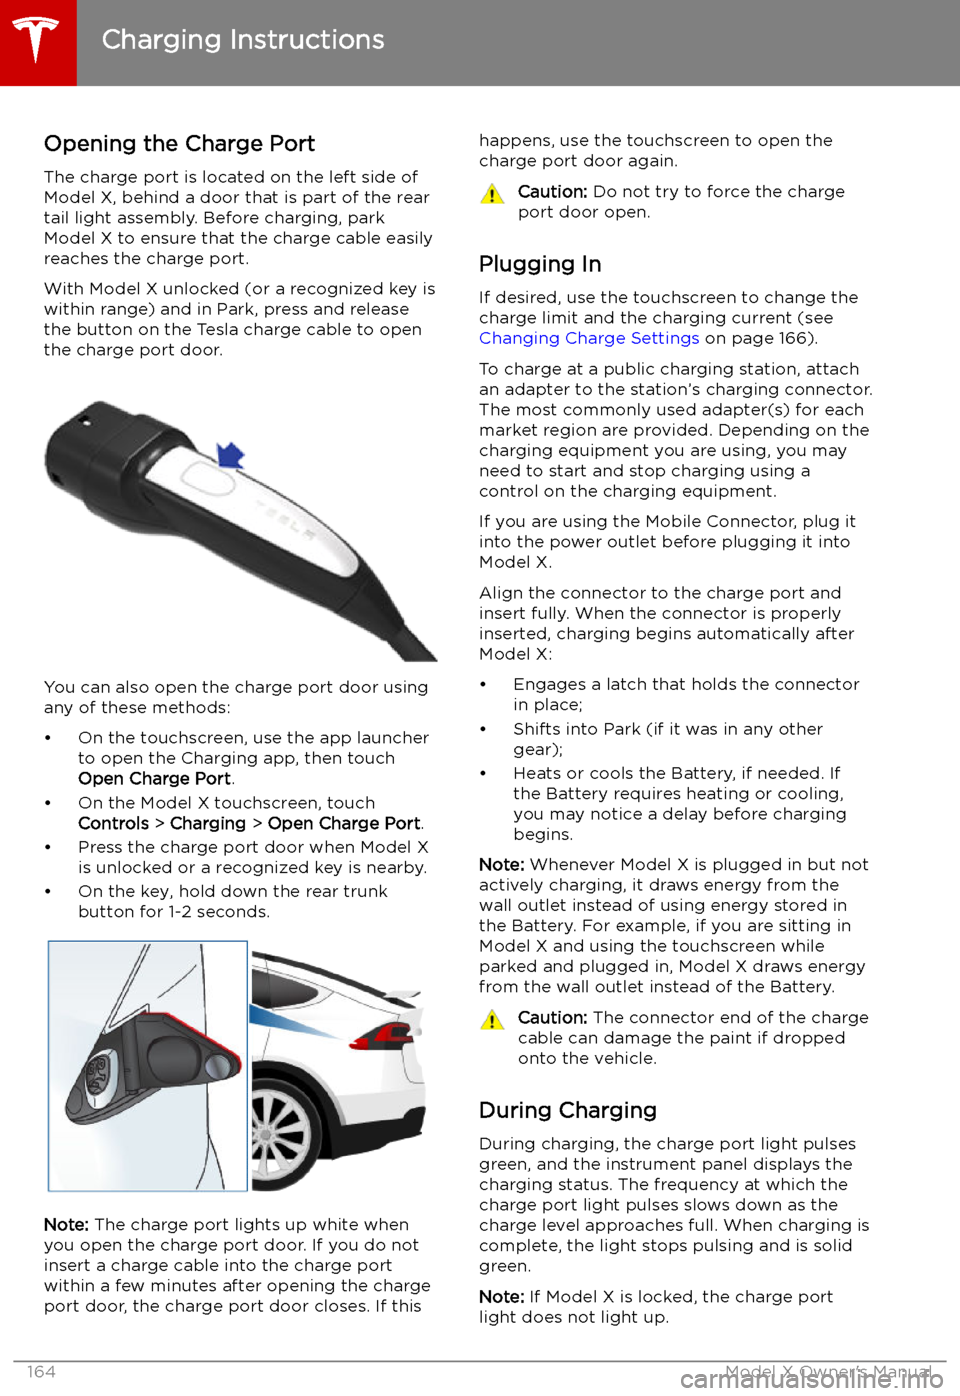
With Model X unlocked (or a recognized key is
within range) and in Park, press and release
the button on the Tesla charge cable to open the charge port door.
You can also open the charge port door using
any of these methods:
Page 166 of 224

If the charge port light turns red while
charging, a fault is detected. Check the instrument panel or touchscreen for a
message describing the fault. A fault can
occur due to something as common as a power outage. If a power outage occurs,
charging resumes automatically when power
is restored.
Note: When charging, particularly at high
currents, the refrigerant compressor and fan
operate as needed to keep the Battery cool.
Therefore, it is normal to hear sounds during charging.
Note: Air conditioning performance is
generally not affected by charging. However,
under certain circumstances (for example, you
are charging at high currents during a
particularly warm day), the air coming from
the vents may not be as cool as expected and
a message displays on the instrument panel.
This is normal behavior and ensures that the Battery stays within an optimum temperature
range while charging to support longevity and
optimum performance.Warning: Never spray liquid at a high
velocity (for example, if using a pressure
washer) towards the charge port while
charging. Failure to follow these
instructions can result in serious injury or
damage to the vehicle, charging
equipment, or property.
Stopping Charging
Stop charging at any time by disconnecting
the charge cable or touching Stop Charging
on the touchscreen.
Note: To prevent unauthorized unplugging of
the charge cable, the charge cable latch remains locked and Model X must be unlockedor able to recognize your key before you can
disconnect the charge cable.
To disconnect the charge cable:
1. Press and hold the button on the
connector handle to release the latch.
Alternatively, unlock the vehicle by
opening a door, using a key fob, or
touching Stop Charging on the
touchscreen. These methods unlock the
charge port as well.
2. Pull the connector from the charge port.
3. Push the charge port door closed.
Note: If Model X is equipped with a motorized
charge port door, it automatically closes shortly after you remove the charge cable.
Caution: Tesla strongly recommends
leaving Model X plugged in when not in use. This maintains the Battery at the
optimum level of charge.
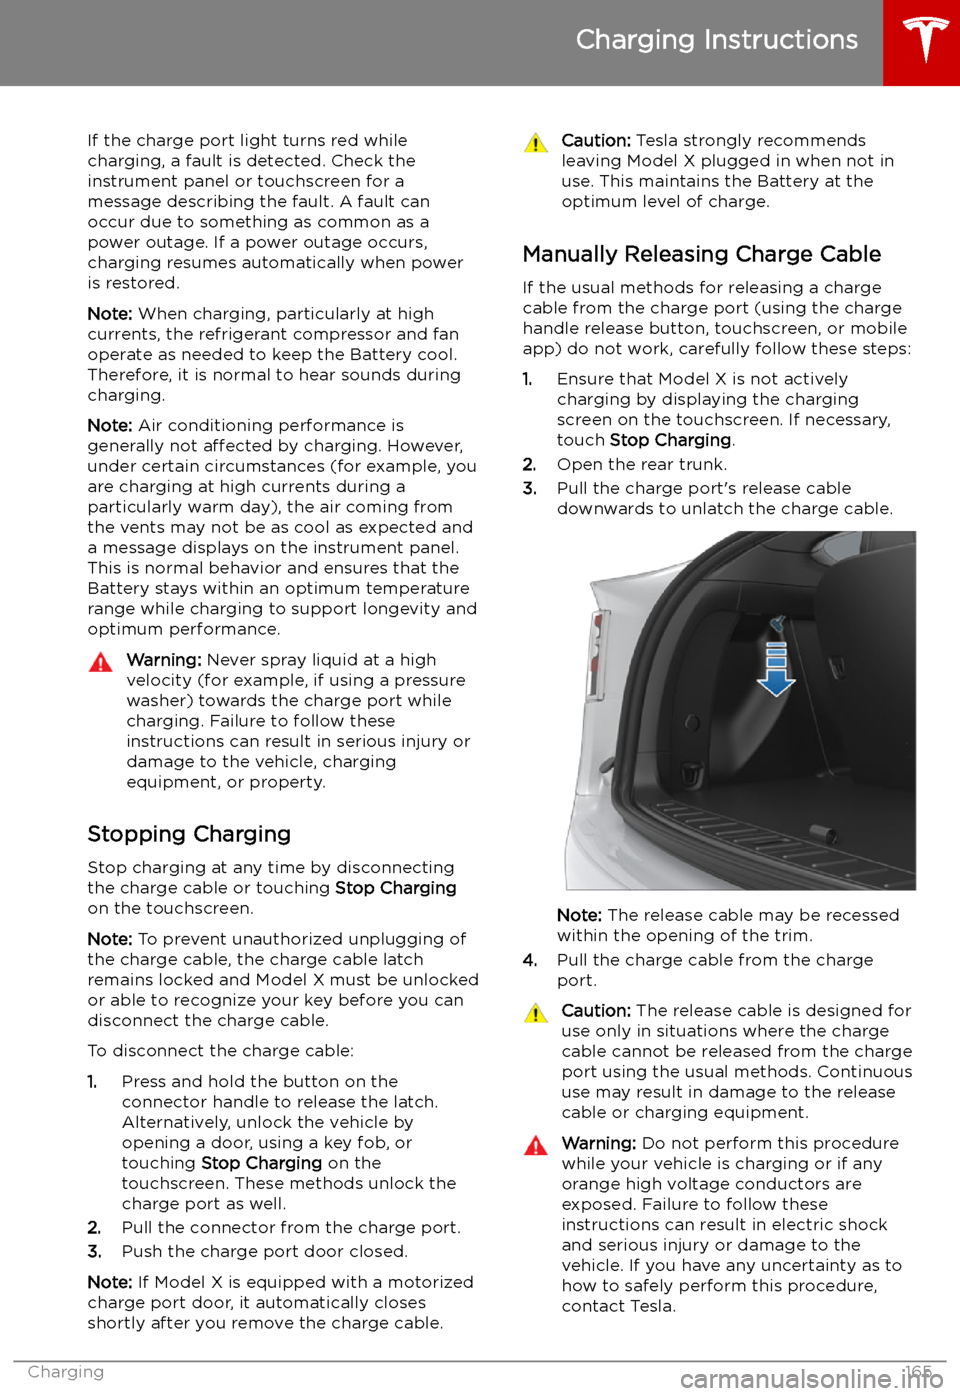
Manually Releasing Charge Cable
If the usual methods for releasing a charge
cable from the charge port (using the charge
handle release button, touchscreen, or mobile
app) do not work, carefully follow these steps:
1. Ensure that Model X is not actively
charging by displaying the charging
screen on the touchscreen. If necessary,
touch Stop Charging .
2. Open the rear trunk.
3. Pull the charge port
Page 196 of 224

TransmissionTypeSingle speed fixed gearOverall Final Drive RatioSmall motor: 9.325:1
Large motor: 9.734:1Reverse GearReverse direction of motor, limited to
24 km/h
Steering
TypeRack and pinion with electronic power steering, speed sensitiveNumber of turns lock to lock2.05Turning Circle (curb to curb)12.44 meters
Brakes
Type
4-wheel anti-lock braking system (ABS)
with Electronic Brake Force Distribution,
Integrated Advanced Stability Control and
Electronic Accelerator pedal actuated
regenerative braking systemCalipersFour piston fixedRotor Diameters (ventilated)Front: 13.98”/355 mm
Rear: 14.37”/365 mmFront Rotor thicknessNew: 1.26”/32 mm
Service limit: 1.18”/30 mmRear Rotor thicknessNew: 1.10”/28 mm
Service limit: 1.02”/26 mmFront Brake Pad Thickness (excluding back plate)0.393”/10 mmRear Brake Pad Thickness (excluding back plate)0.354”/9 mmParking brakeElectrically actuated parking brake
calipers
Subsystems
Specifications195
Page 207 of 224

3.Fully insert the tow eye into the opening,
then turn it counter-clockwise until
securely fastened.
4. Attach the winch cable to the tow eye.
Caution: Before pulling, make sure the
tow eye is securely fastened.
5. Activate Transport Mode by touching
Controls > Service > Towing .
6. Pull Model X slowly onto the